NEW Invisible Zipper Tutorial

If you're a beginner sewer or would like to learn another method of inserting an invisible zipper, then this is a tutorial just for YOU!

NOTE: This tutorial is demonstrating a side invisible zipper (as used in our Chloe Pant and Libby A-line Skirt patterns). As well as adding tear-away vilene shields to the waistline to avoid stretching at the facing stage, tear away vilene shields is also added along the zipper opening to avoid stretching along the hipline curve when attaching the invisible zipper. If inserting an invisible zipper on a straight back seam, vilene shields aren't necessary.

Inserting an invisible zipper

Pin right sides of front and back (outer left hand side of skirt), and stay stitch side seam with long basting stitch (using stitch length 4 or 5 on your machine). Sew correct seam allowance.
Press seam open.
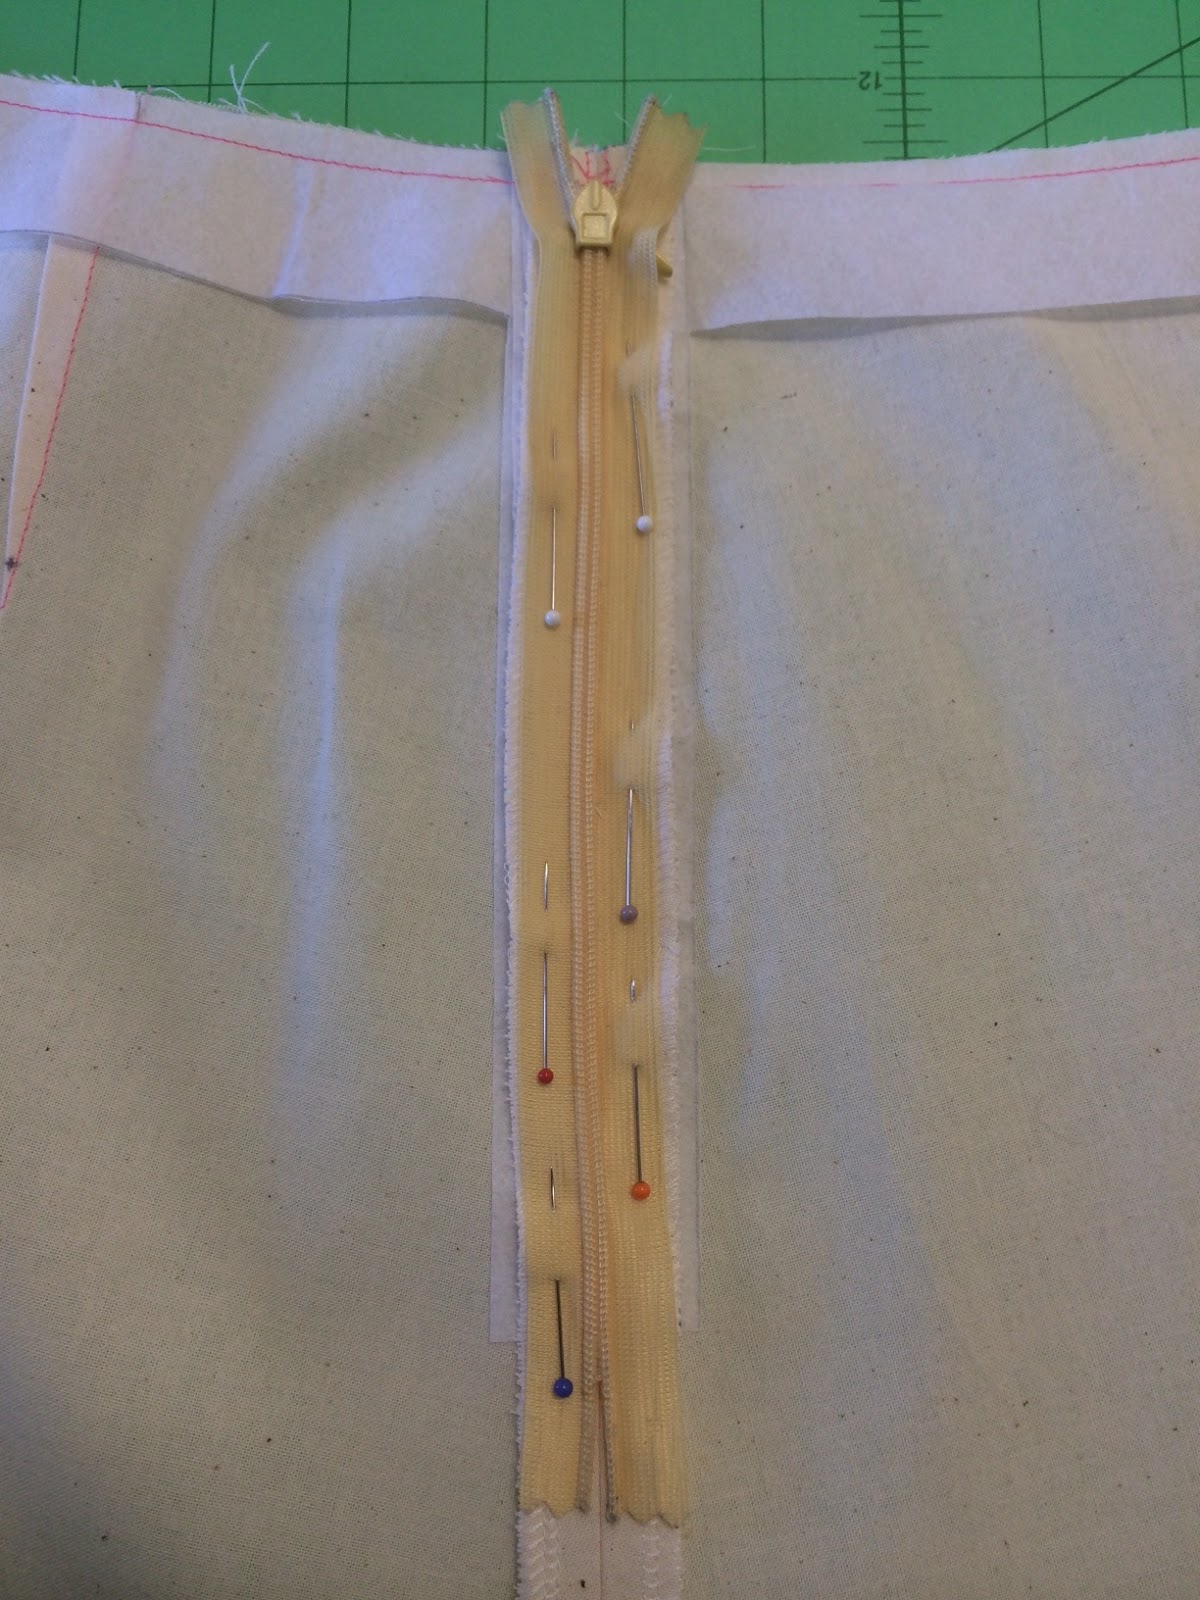
Place right side of invisible zipper face down to open seam allowance. The zipper needs to line up with seam stitching line... 
 ...and the top of the zipper puller (at plastic stopper) should be just under seam allowance on waistline. In this case it's 1/2". (Note: adjust accordingly to your pattern waistline seam allowance)
Pin zipper tape to seam allowance only.
Baste stitch zipper tape edges to seam allowance.
Unpick side seam machine basting stitches (not the basting stitches on zipper tape), starting at waistline and finishing approx 2" down from zipper notch point on side seam.
Open up zipper.
The invisible zipper is now in the correct position and you are ready to sew the invisible zipper in place. Change your machine foot to an invisible zipper foot. With your zipper open, you should now have the zipper teeth facing away from the seam allowance. 
Roll out your zipper teeth and drop your invisible zipper foot down onto zipper, making sure to catch the zipper coil into the groove under the foot.
This helps in turning the teeth coils out of the way so that the machine can stitch behind the teeth. Starting at waistline to finish just before the zipper puller, stitch both sides of the invisible zipper in the same direction. Note: when sewing opposite side of zipper tape use opposite groove under the foot. 
Pull up zipper.

Lastly, tear away Vilene shields on zipper opening and unpick basting stitches at end of zipper to hemline. Remove invisible zipper foot from your machine and replace with regular foot. With right sides together, sew up the rest of the side seam (with normal stitch length), taking correct seam allowance from hemline to stitching line where zipper ends.

This method of basting the invisible zipper tape to seam allowance helps to get your invisible zipper positioned correctly, in particular when making a garment with a waist seam (see image above).

Hope you've found the tutorial helpful :)

Labels: